Get Started
Introduction
Learn about Pipecat and how to get started.
Pipecat is an open source Python framework for building voice and multimodal AI bots that can see, hear, and speak in real-time.
The framework orchestrates AI services, network transports, and audio processing to enable ultra-low latency conversations that feel natural and responsive. Build everything from simple voice assistants to complex multimodal applications that combine audio, video, images, and text.
Want to dive right in? Check out the Quickstart example to run your first Pipecat application.
Quickstart
Build and run your first Pipecat application
What You Can Build
Voice Assistants
Natural, real-time conversations with AI using speech recognition and
synthesis
Phone Agents
Connect to your agent via phone for support, intake, and customer service
interactions
Multimodal Apps
Applications that combine voice, video, images, and text for rich interactions
Creative Experiences
Storytelling experiences and social companions that engage users
Interactive Games
Voice-controlled games and interactive experiences with real-time AI responses
Conversation Flows
Build structured conversations with Pipecat Flows to complete tasks and improve LLM accuracy
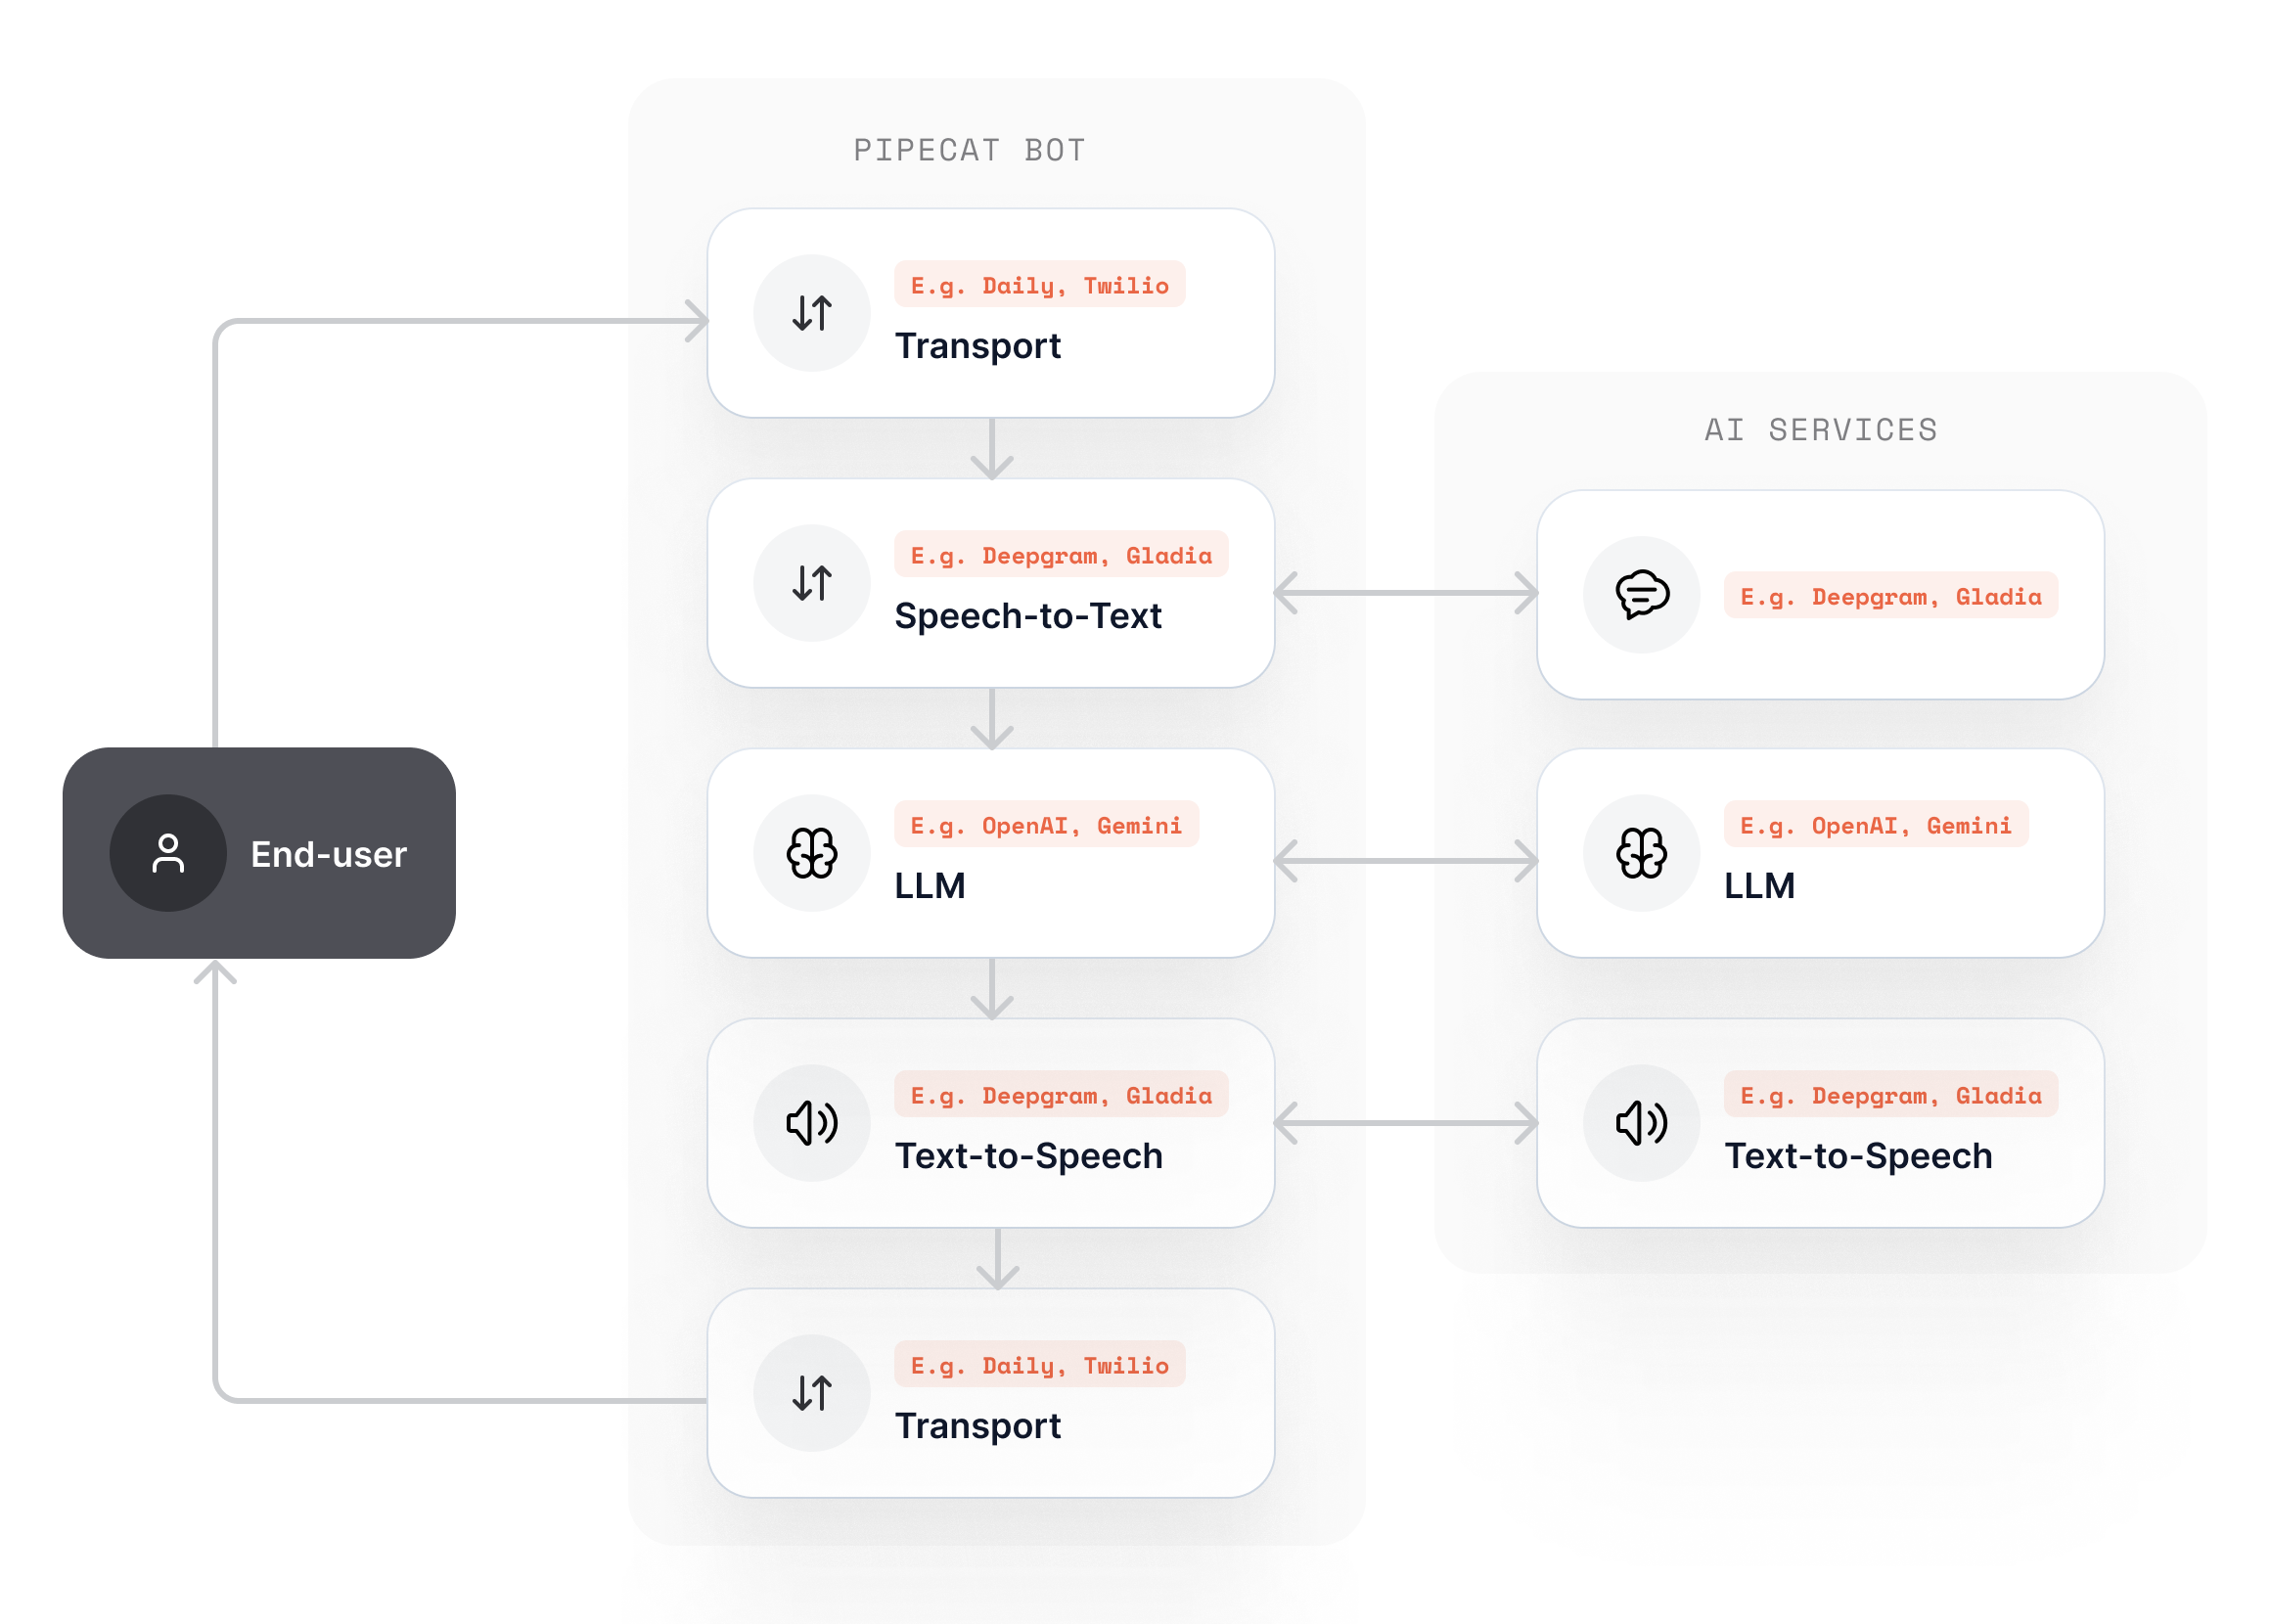
How It Works
Pipecat orchestrates AI services in a pipeline, which is a series of processors that handle real-time audio, text, and video frames with ultra-low latency. Here’s what happens in a typical voice conversation:- Transport receives audio from the user (browser, phone, etc.)
- Speech Recognition converts speech to text in real-time
- LLM generates intelligent responses based on context
- Speech Synthesis converts responses back to natural speech
- Transport streams audio back to the user
Ready to Build?
The best way to understand Pipecat is to build with it. Start with our 5-minute quickstart to create your first voice AI bot.Quickstart
Build and run your first Pipecat application